How to pimp your terminal in macOS
Let’s take a look at how you can make your macOS terminal more user friendly, and make it look dope at the same time.
Back in 2019 Apple ditched the default shell bash and replace it with zsh (because of licensing issues). This is good news, because zsh is our preferred choice. You don’t need to install it manually anymore. Score!
What we want to achieve:
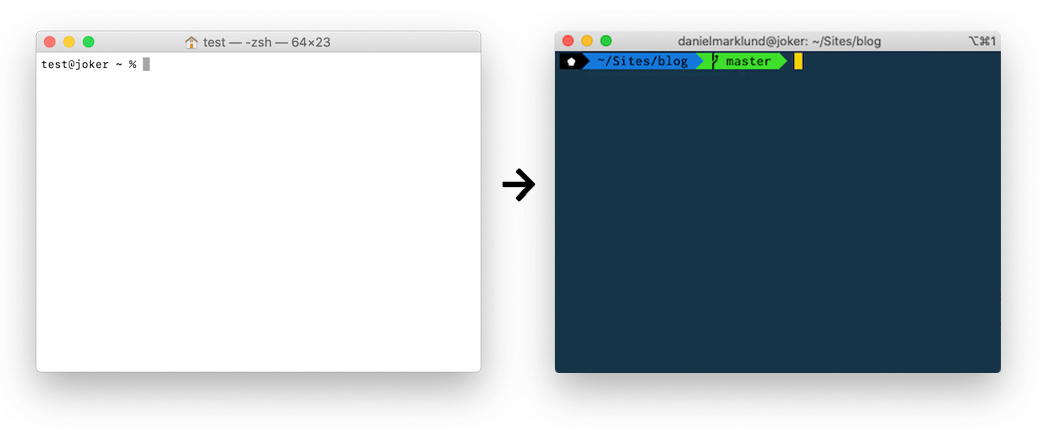
It may not look that impressive in a static image. But believe me, it comes with a log of usability improvements. We will soon go over them one by one, along with some tips and tricks.
First we have to make some installations and configurations. Including:
- Installing Homebrew
- Installing iTerm2
- Installing Oh My Zsh
- Installing the
autosuggestionsplugin - Selecting a theme and font
Installing Homebrew
The most popular package manager for macOS is called Homebrew, or brew for short. We will use it to install the rest. If you want to know more about brew you can check out my post “Brew, rbenv and bundle explained”.
First we need to install CLI tools for Xcode. Open a terminal and run this command:
xcode-select —-installTo install brew you simply open a terminal and paste this command:
/bin/bash -c "$(curl -fsSL https://raw.githubusercontent.com/Homebrew/install/master/install.sh)"
It normally takes a few minutes to complete. Be patient.
Installing iTerm2
The regular Terminal that is shipped with macOS is sufficient. But I still prefer iTerm2. It’s more flexible and comes with some additional features.
You can download the app manually from the iTerm2 website or you can save yourself some trouble by using cask which helps you install apps from the command line. Open your terminal and write the following commands:
brew install cask
brew cask install iterm2
Open iTerm by pressing ⌘ Command → Space, write iterm and hit enter. With iTerm.app open and the window in focus, click the word ‘iTerm2’ in the Menu bar. Set it to default by clicking ✓ Make iTerm2 Default Term in the dropdown. While you are there you can also make it a bit more secure by clicking ✓ Secure Keyboard Entry.
Once that is done I recommend dragging the app to the Dock so it’s easily accessible.
Installing Oh My Zsh
Oh My Zsh is a framework that extends your zsh shell with a bunch of handy plugins and nice themes. Which we will get to in second.
Install it by opening iTerm and write the command:
sh -c "$(curl -fsSL https://raw.github.com/ohmyzsh/ohmyzsh/master/tools/install.sh)"Installing the zsh-autosuggestions plugin
zsh-autosuggestions is a great plugin that will suggest auto completions based on what you type.
git clone https://github.com/zsh-users/zsh-autosuggestions ${ZSH_CUSTOM:-~/.oh-my-zsh/custom}/plugins/zsh-autosuggestionsNext. Edit your ~/.zshrc file to activate it. Add zsh-autosuggestions to the list of plugins. Find the line that mention plugins. Make sure it’s uncommented by removing the #-sign in the start of the line (if present). This is how my plugins definition looks like at the moment:
plugins=(
 git
 zsh-autosuggestions
)
I normally use the command nano ~/.zshrc to edit the file. Once the changes are made you can save it by pressing ⌃Control + X followed by Y. If you have Visual Studio Code (or any other editor) and want to make changes there instead you can click File → Open which will bring up the dialog. Click ⌘Command + ⇧Shift + H to quickly navigate to your home folder. Then press ⌘Command + ⇧Shift + . to temporarily show hidden files. You will find the file .zshrc somewhere close to the bottom.
Once the changes are made and the file is saved you need to open a new iTerm window to have it reload the settings. Or simply write source ~/.zshrc.
Selecting a theme and font
Next up is to select a theme. Oh My Zsh comes with a bunch of themes preinstalled (Check out the previews). Go ahead and choose any that you like.
To activate a theme you simply open ~/.zshrc and find the line that says ZSH_THEME="robbyrussell" and replace “robyrussel” with the theme of your choice. Please note that some themes requires you to install new fonts. If so there should be instructions provided on the link above.
My theme of choice - cobalt2
I really like cobalt2 that unfortunately doesn’t come preinstalled. Download the zip. Double click the cobalt2.itermcolors file (if you get a complaint you can always right click the file and choose open, then click the button Open). Then copy the cobalt2.zsh-theme file to ~/.oh-my-zsh/themes/. Open ~/.zshrc and change the theme to ZSH_THEME="cobalt2", save the file and restart iTerm2.
You also need to change the font in iTerm2. I use Insolata for Powerline, Medium, 15pt - Patched for iTerm. Install it, open iTerm2 preferences from the top bar. Go to Profiles → Text and change to the newly installed font.
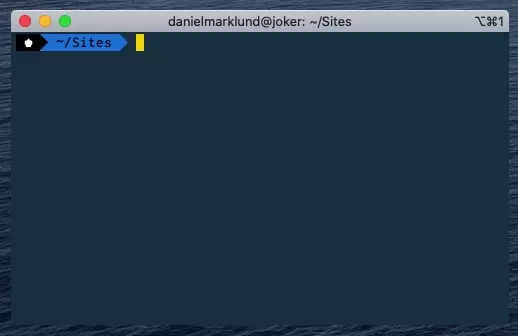
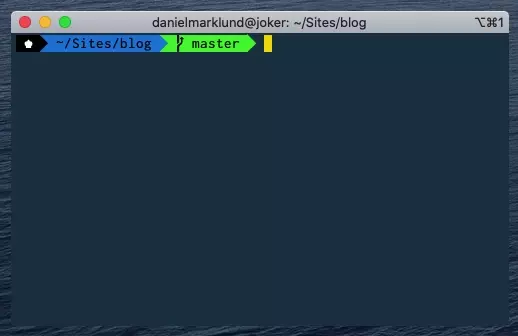
This is what you should end up with:

That’s it! Now we have everything setup and we can move on with our day.
Zsh Tips and Tricks
Let’s finish off with some handy tips and tricks that will make your life in the terminal more pleasant.
Simple Folder navigation
Oh My Zsh makes it easier to navigate between folders. Just type cd followed by the path you want to peak into, then hit ⇥ Tab multiple times until you find what you are looking for.
History and autosuggestions
Oh My Zsh looks into your history and suggests auto completions once your start to type. If you like the suggestion, you can simply press the right arrow key → on your keyboard. Or you can use ↑ and ↓ to cycle to previous commands, but the kicker here is that it will limit the search based on your current entry. This feature alone saves a lot of keystrokes since you often repeat commands you’ve used in the past.
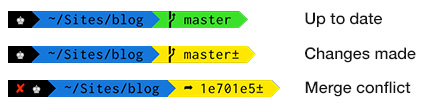
Git Feedback
With my current theme you automatically get feedback of the git status when you are working in a git project. It’s super helpful to quickly know when you have uncommitted changes or conflicts.
Handy shortcut keys
⌃Control + L- Clear screen⌃Control + A- Go to beginning of line⌃Control + E- Go to end of line⌃Control + K- Delete from cursor to end of line⌃Control + W- Delete closest word backwards from cursor⌥ Option + Mouse click- Navigate to mouse cursor
Wrapping up
Congratulations. You are now a power user! I hope you found this useful. Drop a comment if you have a killer tip that I’ve missed, or if you have any questions.